


How to customize a metal coins?
Customized Coins Standard Options
Main Variations:
-
Style
- Styles divided into two kinds: One side with colors logo, Two sides with colors logo. Style should be chosen based on how sides have colors. It doesn’t matter if it is soft enamel, hard enamel, or offset printing + epoxy dome.
- One Side with Colors
- Both Sides with Colors
-
Size
- Here are the sizes we offered in CRM. In almost all cases, we are able to do coins smaller than 1.5 inches, and larger than 3 inches, but requires a NPD QUOTE REQUEST
- 5 inches
- 75 inches
- 0 inches
- 25 inches
- 5 inches
- 75 inches
- 0 inches
Special Options
-
Border Edge
- We have offered Nine certain different border and edges for your choose.
-
Standard Flat Border
- The most normal border.

- Rope Cut Border
-


-
Oblique Cut Border
-
-
Wave Cut Border
-
-
Spur Cut Border
-
-
Petal Cut Border
-
-
Cross-Cut Border
-
-
Reeded Edge
-
-
Text on Edge
-
-
Other Custom Border & Edge
- Custom Border & Edge SO is not an actual manufacturing method, but when the customer wants to emphasize their border or edge customization, it is a useful special option to tell design, production and factory to pay close attention.
-
Design Colors
-
3D Mold
- 3D Mold allows for different effect that are unattainable by a 2D Mold. 2D mold is limited to 3 layers (for dye struck & soft enamel) and 2 layers (polished down to 1 layer for hard enamel).
- Each embossed/debossed protrusion must be flat and straight, and only protrudes at a 90 degree angle from the base of the metal product.
-
3D mold allows for a few other methods of molding the surface of the metal, including
- non-90 degree acute and obtuse protrusions, curvature of the protrusions (meaning not flat/straight),
- a super-embossed effect which can protrude 2-3mm away from the surface of the metal product, and a . . .
- curved body effect which make the entire design take the shape of a bulging bubble.
-
2D Mold Examples:

-
3D Mold


-
3D Mold “curved surface”, and “super embossed surface” Examples:

-
3D Mold “curved body

-
3D Mold Curved Surface:


- 3D Mold Super Embossed
-


- 3D Mold bulging body
-


-
Sequential Numbers (Laser Engraved)
- Sequential numbers are done with laser engraving, and so they can not have color fill. In addition the typeface/fonts available may be limited. It is a good idea to let the customer know these limitations before they commit to sequential numbers.
-


-
Sandblasting (Fine)
- Sandblasting is a useful tool for shiny metallic finishes to increase readability or visual clarity of embossed design elements. Sandblasting the background around lettering and design elements keeps the design element shiny, but the background around it doesn’t shine as much, so it creates increased contrast / enhanced readability effect. But it also works with other types of metallic finish too, like antique finishes to make it look even more antique/gritty.
- Only one type (fine vs. coarse) can be chosen on one metal product.
-


-
Sandblasting (Coarse)
- See Sandblasting (Fine) above.
-
Offset Printing with Epoxy Coating (One Side)
- Most often paired with soft enamel designs, to keep the textured embossed/debossed look, but add a glossy coating and smooth feel.
- Epoxy dome can not be paired with Silver or Chrome Metallic finish of any kind due to a chemical reaction during manufacturing process ; and can not be paired with Antique metallic finish of any kind, because the “blacking” process would tarnish the epoxy dome.
- Offset-Printing+Epoxy dome is incompatible with no-color style metal products.
-
Offset Printing with Epoxy Coating (Both Sides)
- See Epoxy Coating (One Side) above.
-
Epoxy Dome (Clear)
- Does not include the offset printing beneath the epoxy dome.
- Most often paired with soft enamel designs, to keep the textured embossed/debossed look, but add a glossy coating and smooth feel.
- Epoxy dome can not be paired with Silver or Chrome Metallic finish of any kind due to a chemical reaction during manufacturing process ; and can not be paired with Antique metallic finish of any kind, because the “blacking” process would tarnish the epoxy dome.
- please pay attention to if add epoxy dome onto surface, the finish will be darker than normal finish.
-


-
Translucent Enamel
- Translucent Enamel is a cool special option that more customers should take advantage of. You can pantone match the color, and since it’s mostly see-through, the metal surface below the translucent colored enamel is also visible, so you can see the details. It works best with shiny metallic finishes.
- Incompatible with no color metal products.
-


-
Glitter Enamel
- Glitter flakes are mixed in with an enamel color. Gold flakes and silver flakes are readily available. Other colors may or may not be available.
- Glitter Enamel is incompatible with no color metal products.
-


-
Glow-in-the-Dark Enamel
- Glow in the dark enamel is actually done by adding the enamel first, letting it dry, then adding a coat of semi-clear glow in the dark enamel over top of the color. For this reason it will add a yellow-green tint to the color it is painted on top of. It glows best on lighter colors, especially white, yellow and green.
- Glitter Enamel is incompatible with no color metal products.
-


-
Soft Enamel Color Fill
- If you do NOT choose a “Soft Enamel” or a “Hard Enamel” option, then soft enamel will be the default. But if the customer opts for hard enamel, then you must choose the SO.
- Incompatible with no color metal products.
-


-
Hard Enamel Color Fill
- See “Soft Enamel Color Fill” above
- Please kindly know that Hard enamel can not do Glitter enamel.
-
Add Ons Backing Options
-
Bottle Opener (Speed Style)
- Coin has a die-cut-out section with a nub used to crack open beers/bottles
-

-
Bottle Opener (Claw Style)
- The design itself has a border shaped to be able to crack open beers.
-

-
Aluminum Metal Core (Simple Designs Only)
- Customers will choose this for a super-light metal
- Can only do very simple designs
-
Adhesive Backing (Standard)
- Coin with adhesive backing .
- Adhesive Backing (Strong)
-
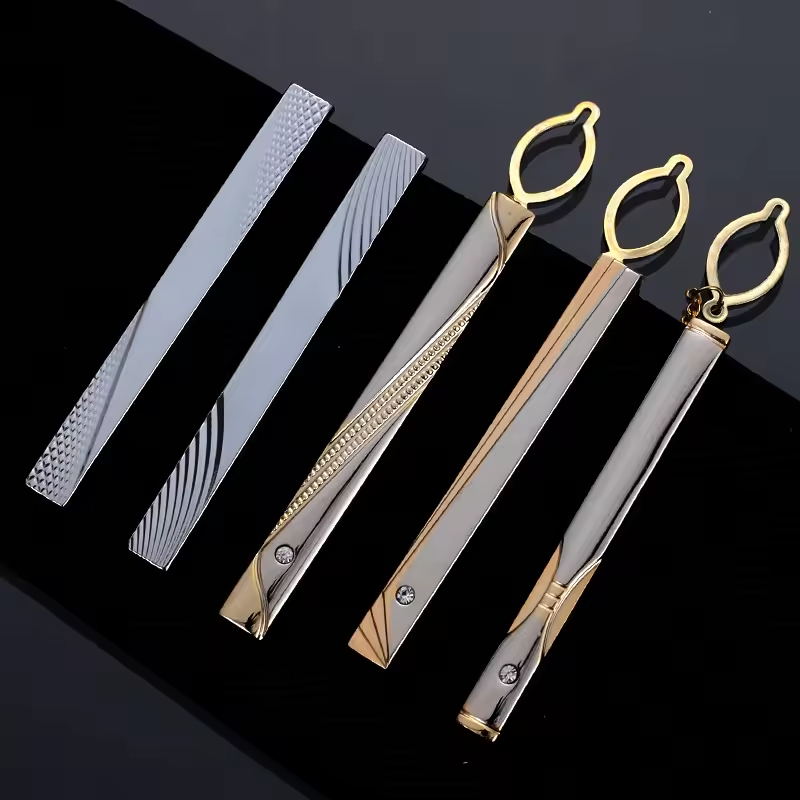
Spinning Centerpiece
- The center of the body has a center-piece that is able to move freely via two prongs between centerpiece and the outside edge.
-


-
Stainless Steel Necklace Attachment
- Coin with a loop and necklace go through the loop to connect the coin.
-

-
Packaging Presentation
- If the size of coins is over 2.5 inches, we always suggest our customer to choose poly bag instead of PVC bag because of our factory cannot provide the bag that size is over 2.5 inches
- Velvet Box
- Velvet Pouch
- Acrylic Case
- PVC Envelopes
- Plastic Coin Capsule
- Clear Plastic Stand
-
Bottle Opener (Speed Style)
-
SurfaceTexture
- Here is the image we show different surface textures, and each texture surface has a special number.
-

- Even Waffle Texture (#6)
- Jumbled Waffle Texture (#5)
- Large Beaded Texture (#9)
- Medium Beaded Texture (#8)
- Medium Rough Texture (#2)
- Micro Beaded Texture (#4)
- Rough Texture (#3)
- Scratched Surface Texture (#11)
- Small Beaded Texture (#7)
- Smooth Texture (#1)
- Wavy Pattern Texture (#12)
- Weave Pattern Texture (#10)
-
Metallic Plating Finish
- Every metal product needs a metallic finish type. In nearly all cases that should be a single finish. The only exception is for Two-Tone Metallic plating.
- On the mockup, should NOT use a pantone color code ; Should be written exactly as in Special Option
- From PCs: when our customer selected satin silver for their metal products, we usually recommend satin nickel to replace satin silver, because silver is super easily to be blacken, so our factory will add the process of oil blasting in the production, however, it will make metal easily to turn yellow, but satin nickel is not affected by this limitation.
- Shiny finishes will not make the design and text clear:
-
Shiny Gold
-
-
Shiny Silver
-
-
Shiny Brass
-
-
Shiny Nickel
-
-
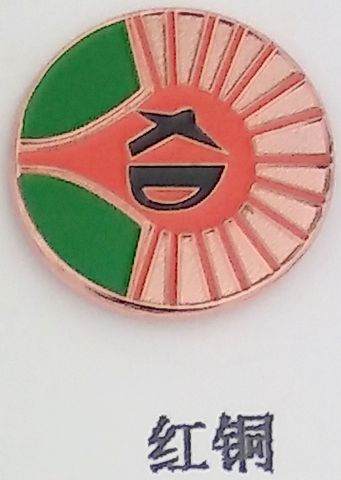
Shiny Copper
-
-
Shiny Rose Gold
-
-
Shiny Chrome
-
-
Shiny Gunmetal
- Note: Gunmetal is one of two choices to for when the customer wants a “black” finish (the other is Black Paint). Gunmetal is a dark grey, but and reflects light in a way that makes it look brighter.
-

-
Antique Gold
-
-
Antique Silver
-
-
Antique Brass
-
-
Antique Nickel
-
-
Antique Copper
-
-
Satin Gold
-
-
Satin Silver
-
-
Satin Brass
-
-
Satin Nickel
-
-
Satin Copper
-
-
Brush Brass


-
Black Paint
- Note: Black Paint is one of two choices to for when the customer wants a “black” finish (the other is Shiny Gunmetal). Black Paint is not as smoothly-metallic looking as gunmetal. It is like a coat of glossy black paint was added around the entire surface of the product.
-

-
Two Tone Metal Plating (Must Be Same Finish Type)
- If the customer wants to do two tone metal plating, then the “Two Tone Metal Plating” SO should be selected, and in addition the two specific metallic finish types should also be chosen.
- Choosing shiny gold and shiny nickel together makes for the best result. Other Two tone metal plating need to enquiry us first.
-

Deviant Options
-
Requires SOURCING or SPECIAL OPTION request:
- Unlisted Sizes
- Specific thicknesses
- Full-3D-Cast Design
- Specific Requests for Other Custom Borders & Edges
- Specific requests for two-tone metal plating
-
Absolutely Can Not Do:
- None now
-
Other circumstances that have special requirements?
- None now
Sales Necessities (Both Invoice Setup & Notes)
Coins Invoice Core Necessities
-
Main MU information is completely filled out:
- Size
- Pantone Colors
- Style
- Metallic Finish
- The correct Style is selected based on design requirements
- Written description or example photos for the design FRONT and BACK
- If there is a special border, then please describe it or show an example photo
- If there is a special edge, then please describe it or show an example photo
- Notes about what design element is embossed/debossed are included
- The “Height” and “Width” fields exactly match the size chosen in CRM, or are left blank
- There are notes about any pantone colors the customer wants (only from 100-7771)
- Colors filled pantone number on Mockup should be same as AI.
Design Necessities (Both Mockup & AI)
-
Main MU information is completely filled out:
- Size
- Pantone Colors
- Style
- Design option
- Metallic Finish
- There are previews of the FRONT and SIDE
- There are HxW brackets for the coin
- If a specific border special option is chosen, then please point it out.
- If there is a specific design or engraving on the edge (side) of the coin, then please show a side view of the coin, and point out the “design on edge / text on edge”
- All special options that are not explicitly depicted on the preview or design are pointed out
- The size and measurements match the invoice specifications exactly
- The special options match the invoice specifications exactly
- There is a standalone design for each design
- There are HxW brackets for each of the standalone designs
- The SO-Cat Metallic Finish is written exactly like the special option (not a pantone code)
- If there is an epoxy dome, then the coverage area of the epoxy dome should be demonstrated
- If there is a 3D mold, then the type of 3D effect needs to be demonstrated via 3D AI file, layers in the AI file, example photos, or cross-sections of the design
- If there is a special packaging/presentation, then it should be demonstrated
- No dye struck line is less than 0.2mm thick (and 0.15mm thick for laser engrave)
- No lettering is smaller than 2-3 mm tall
- There are 3 or less layers for dye struck designs
-
If the Package Type is NOT a pvc envelope, then please show the type of package on the mockup.
- Velvet Box
- Velvet Pouch
- Acrylic Case
- PVC Envelopes
- Plastic Coin Capsule
- Clear Plastic Stand
-
When these special options in general are used on the design, please point them out:
- 3D Mold
- Sandblasting
- Offset Printing + Epoxy Dome
- Epoxy Dome / Epoxy Coating
- Printed (Offset and/or Surface Printed)
- Laser Engraving
- Specialty Enamels
- Cut-Out Area (area where there is a empty space / hole in the design)
- Rhinestones
- Specific Surface Texture
- Two-Tone Metallic Plating/Finish
- Special Border Edge
Design Guide & Mockup Tips
- None at this moment
-
Maximum number of Colors ???
- Hard Enamel - 20 Maximum limit, but each must be minimum 0.2mm area, and have 0.2mm wall between the color and other design elements, so essentially, maximum number of color depends on the size of the coin.
- Soft Enamel - Same as Hard Enamel Above
- Offset Printing + Epoxy Dome: unlimited colors, but not as bold/bright as enamels
-
Line Thickness
- Debossed Lines 0.2 mm thick
- Embossed Lines 0.2 mm thick
- Debossed Lines with color fill 0.2 mm thick
- Embossed Lines with color fill 0.2 mm thick
- Walls (around and between colors) 0.2 mm thick
-
Text Sizes
- Debossed text can be 2-3 mm tall, but the lines of each letter must be at least 0.2 mm thick
- Embossed text can be 2-3 mm tall, but the lines of each letter must be at least 0.2 mm thick
-
Embossed/Debossed Levels
- Die Struck up to 3 levels
- Soft Enamels up to 3 levels
-
Hard Enamel
- Up to 2 levels before polishing (for purpose of color fill)
- Only 1 level after being polished flat
-
Sandblast can, . . .
- Be done on entire surface of die struck coin
- Be done on lower layers of coin, but top layer polished to be shiny
- Be done on both sides of the pin
- Only be done with either “Rough” or “Fine”, but not both
-
Two-Tone Metal Plating, . . .
- Can only be done with two “Antique” finishes or two “Satin” finished, but can NOT have 1 “Antique” and 1 “Satin”
- Can not do any of the “Glossy” or “Other” finishes
- Cut-Outs (empty spaces / holes in the design) must be at least 2 mm squared
-
Neither Offset Printing nor Epoxy Dome can combine with, . . .
- Silver or Chrome (because the baking process of Epoxy will react with these metals)
- Any of the Antique finishes (because the antique “blacking” process will tarnish the epoxy)
-
Metallic Finish/Plating ;
- Should NOT use a pantone color code ;
- Should be written exactly as in Special Option
-
Pantone color swatch and Pantone color code ;
- Must be a color between 100-7771 ; We do not accept other colors (we only have pantone swatch books that go from 100-771 ;
- The color swatch used should accurately match the code used ; We can NOT change the swatch, but not change the code on the mockup ;
- Sales/CS should explain a common pain point — The pantone swatch on the mockup doesn’t exactly seem to match the pantone swatch on the technical mockup, and on the sample photo, and on the actual order when in hands. Even if throughout the entire process we use one SINGLE pantone color CODE, different monitors and different versions of Adobe Illustrator will display the color slightly differently. Could show customer what we mean by asking them to go to Pantone official website enter the same pantone color on their cell phone as on their computer to so “Oh, there is a difference”.
- When epoxy dome is selected, point out the area that the epoxy dome covers
- When both offset printing and soft enamel are on same design, point out what areas should be filled with soft enamel, and what areas should be offset printed.
- When there is laser engraving, show what part of the design should be laser engraved (instead of embossed/debossed).
- When the design has 3D Mold,please point out the area and should show more different angles of the design, or a crosscut to show the gradual rising and falling surfaces.
- When the design has 3D Mold and soft enamel color fill, the areas that are have color fill must be 2D. So, point out the 3D and 2D areas of the design to differentiate.
-
3D mold to do actual photos of real people’s faces is not recommended, it is a high-redo/refund option because the coin usually makes the person look stupid.
-
- When text is smaller than the required size for embossment/debossment, then we must use surface printing. Point out any text that is printed.
-
Pantone Colors
- Not offer completed pantone color number, please offer completed pantone color number
- Pantone color number you offered is not exist on real pantone color book or are not match with pantone book sometimes, please check before you send to us.
-
AI & Mock up
-
The image in AI file should be a Vector image not a JPG, JPG image doesn't work for factories.
- The only exception is hi-res images for offset printing + epoxy dome.
- Design on AI file is not completely same with the mock up or your AI file is blank sometimes.
- Sometimes the images overlapped in AI file.Some details or colors number are missing in AI file.
- The special options /attachments /size pointed on the mock up are not match with the invoice.
- The special option is 3D mold but the mockup and AI file show it is a 2D. Need to show different angles.
- There are some special options conflicts on the same mock up. Like choose hard enamel and soft enamel at the same time .
-
The image in AI file should be a Vector image not a JPG, JPG image doesn't work for factories.
-
Metal Finish
- The place that do not to show the pantone color number if it is metal finish, just write the name of the metallic finish as shown in the special option
-
Color Filled
- Only deboss area can be color filled.The thinnest color filled area is 0.2mm,
- Between different color filled area need a metallic border

You can follow the following video to customize your coins:


Leave a comment